BIOL 121: F20-S21 MANUAL
  • Home
  • About
  • Unit 1
    • Lab 1
    • Lab 2
    • Lab 3
    • Lab 4
    • Lab 5 ONLINE ONLY
  • Unit 2
    • Lab 6 Part 1 OnLine
    • Lab 6 Part 2
    • Lab 7
    • Lab 8
  • Unit 3
    • Lab 10
    • Lab 11
    • Lab 12 Online
  • Library
  • WKU Blackboard

​Research Question: Is Bushmeat Sold in Kenyan Butcheries?

  • Exercise I
  • Exercise II
  • Exercise III 
<
>

Exercise I. DNA Extraction

Our meat samples have been collected, processed in the field and brought back to WKU. In the WKU Biotechnology Center, Ms. Naomi Rowland (our collaborator) has completed the digestion of the samples and a procedure designed to extract the DNA. DNA extraction is an important step in DNA analysis, which is at the forefront of biomedicine and forensics. DNA Extraction Buffer is used for this purpose.
Extraction of DNA from meat samples is a lengthy and difficult process. It has already been completed for our samples. Today, you will mirror this process: you will be extracting DNA from fruit samples. You may need to review the structure of DNA (covered in Ch 4 of your BIOL 120 Pearson text). 
DNA extraction includes the use of an extraction buffer and ethanol:
  • Our extraction buffer includes detergent to break apart lipids and proteins and "free" the DNA from the nucleus (to get it out of the cell).
  • It also includes salt with (+) charged sodium ions to neutralizes the (-) charge on the sugar-phosphate backbone of DNA, making it less soluble in water (so it stays together).
  • We use ethanol to separate the DNA from the mixture. DNA is not soluble in ethanol so it is visible (so we can see it). For our purposes we will use isopropyl alcohol (rubbing alcohol) as a good substitute. 
Procedure
  1. Open your Lab 10 Lab Notebook Guide.
  2. Review your fruit choices and select two to from which to extract DNA.
  3. Do some research online and design a hypothesis regarding which one will show higher levels of DNA precipitation.  This is informal. THINK! What do these fruits have in common? Why these species? HINT! What is polyploidy?
  4. Also, think about how you will "decide" which one produces "MORE" DNA. This in an objective exercise but you still need a plan. Here's what you can expect to see if extraction is successful.
  5. You MUST get your hypothesis and analysis plan checked before you can proceed. Everyone should have it written down along with some research points. 
  6. Once "checked," here's the general protocol for your fruit:
  7. Clean the fruit and remove any leaves or skin. 
  8. You'll need a sample about the size of a strawberry.
  9. Place it in a zip lock baggie.
  10. Smash up the fruit with for 2 minutes.
  11. Using a small graduated cylinder, add 20mL of extraction buffer.
  12. Close the bag and smash again for 1 minute.
  13. Pour the extract into the filtering apparatus and let it drip directly into a clean test tube.
  14. Only fill the test tube so that it is 1/8 full.
  15. Slowly add 5mL of cold ethanol (from the refrigerator freezer) into the tube, kept at a diagonal, so that the test tube is half full.
  16. You should see “cotton-like” wisps of material forming at the interface of the liquids in the test tube. DO NOT STIR OR AGITATE THE CONTENTS OF THE TEST TUBE!
  17. Take notes on the results and be sure the take photos to compare with your other extraction. The visibility of the DNA is time sensitive so don't let it sit for too long. 
  18. Get your instructor to check your DNA.
  19. Repeat for your other fruit.
  20. Complete Exercise I in your Lab Notebook Guide. 
Picture
Click to download.
Picture
Hmm? What's this about? Click to enlarge.
What is a berry?
Picture
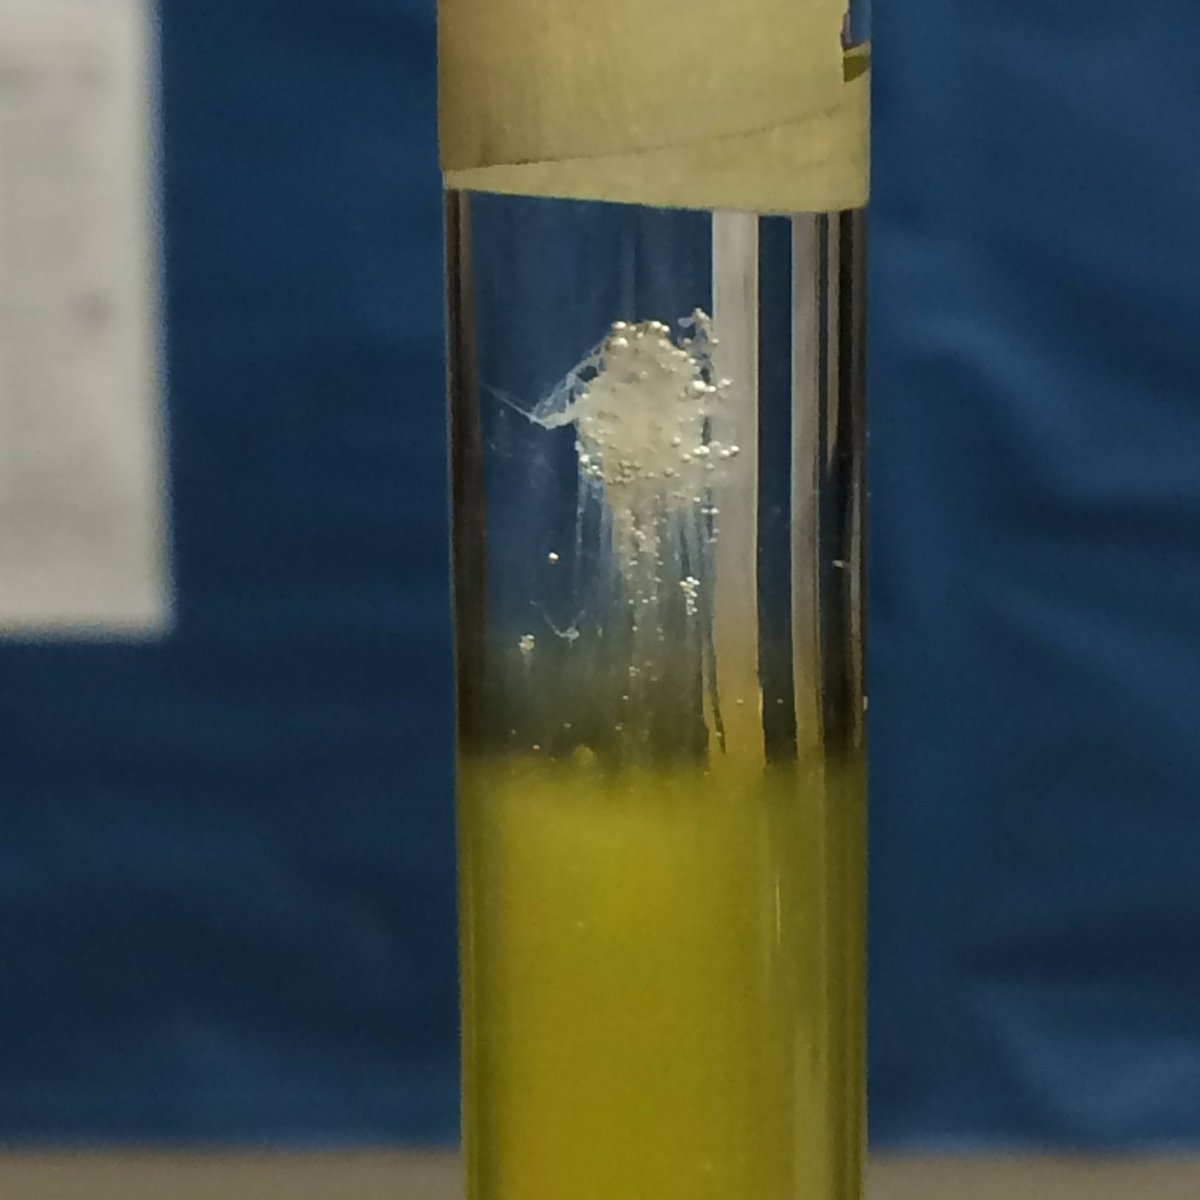
Fruit + extraction buffer.
Picture
Picture

Exercise II. What part of the DNA do we need? How much do we have?

Now, that understand the extraction process, let's move back to our bushmeat samples. Following extraction of DNA from the meat samples, we need to determine how much DNA we have. In other words...were we successful and to a high enough degree to allow for the next steps? Following extraction we have tons of DNA! But, that means that in fact we have a lot of genetic material that we do not need and certainly do not want to make copies of. DNA is conserved at different rates across species. Meaning we share different amounts and different genes. We need to find a gene (a section of DNA) that all mammals have, BUT that is a different enough in every species of mammal to afford us the ability to identify the species from the DNA sequence of the gene. The particular gene required is called the Gene of Interest or "GoI." ​​
Picture
Animal barcoding studies use a region in the mitochondrial cytochrome c oxidase 1 gene (“CO1”) or the cytochrome b gene (CYTb).
Picture
Plant barcoding studies use one or a few plastid regions and the internal transcribed spacer (ITS) region of nuclear ribosomal DNA.
  • Turns out, the DNA for ANY life, is very similar. For example we share 50% of our DNA with bananas. Within our species, we share 99.9%. Watch the video on SURPRISING Animals Related To Humans. It's fun reminder of how similar we all are! 
  • For our analysis, we need a gene that will allow for something called bar-coding. Essentially, bar-coding is using a short segment of DNA, particular to a certain gene, that differs enough to allow for species identification. This is similar to  the bar codes on grocery items, but instead of using lines of varying widths, we use the sequence of nucleotide base pairs (As, Cs, Ts and Gs) in specific genes. Which genes to use depends on your taxa and your research question. Watch the video on DNA Barcoding in the sidebar.
  • The region of DNA that codes for cytochrome complexes (b and c) is particularity useful in barcoding. Do you remember what cytochrome b and cytochrome c do? Think back to cellular respiration and the electron transport chain.  
Procedure​: Estimate the number of DNA fragments (our gene of interest, cytochrome b) we may have following extraction.
  1. Answer the questions associated with DNA structure and barcoding in your Lab Notebook Guide.
  2. Following DNA extraction, we test the amount of purified DNA in our samples, to ensure enough product exists for PCR to work.
  3. We conduct this analysis using a spectrophotometer. The results for our samples are shown in the figure at right in ng/uL. ​Sample 8 yielded no genetic material.
  4. Next, we need to know how much of our GoI we have. Using the total DNA yield, we can calculate the potential total number of cytochrome b (cytb) fragments we have extracted from each sample...​
  5. Open the "DNA YIELD CALCUALTIONS" document  in Excel from the sidebar. You will make your calculations here and copy paste the table into your notebook guide.
  6. Of all the DNA we extracted first we need to determine how much is mitochondrial DNA? This is because the cytb gene is on mitochondrial DNA. Mitochondrial DNA (mtDNA) comprises ~ 3% of all DNA, is circular and contains roughly 16,000 base pairs (bp), on average, in mammals.
  7. Next we need to determine how much of the mtDNA might be cytb. ​The cytb gene comprises ~ 7% of mtDNA. Review the figure mapping mitochondria at the bottom of this page. ​ 
  8. Once you have determined the amount of cytb DNA we have (in ng/uL), the next column, the amount or number of strands we have, will auto-generate. 
  9. You are only completing the Lab 10 portion of the table at this time.
  10. You will copy/paste your excel table into your Lab Notebook Guide.​
We will use the cytochrome b gene (CTYb) for species ID of our bushmeat samples. It meets our requirements. It is shared across all mammals BUT, differs enough between species for the sequence (of As, Ts, Cs and Gs) to give us a species-level ID.
Picture
DNA yield following extraction.
DNA yield calculations in excel
Picture
Gene map of human mitochondrial DNA. In mammals, each double-stranded circular mtDNA molecule consists of 15,000–17,000 base pairs. In humans, approximately 7% mtDNA is of cytb, which we are using to make our estimates.

EXERCISE III. Polymerase Chain Reaction (@ home virtual lab)

Polymerase chain reaction (PCR) involves the amplification (or copying) of a specific segment or fragment of DNA to allow for continued analysis. PCR can be used to: identify individuals or species,  for criminal proceedings, paternity determination or pathology. It is one of the most powerful tools of modern biology.
We would have created PCR cocktails for each of our bushmeat samples and placed into a thermocycler for synthesis. Instead, you will do a short virtual PCR lab. Read over the information in PCR below and complete the procedure.
​Once DNA has been extracted, it is mixed into a particular PCR solution containing:
  • Taq polymerase: A type of heat-stable DNA polymerase derived from a species of bacteria living in hot springs. Because Taq polymerase continues to function normally at high temperatures, using it allows researchers to separate the DNA strands without destroying the polymerase.
  • Primers: Short, single-stranded sequence of RNA or DNA that enables the start of replication of a DNA sequence that is synthesized from the 3’ end of the primer. Two types are needed, a forward and a reverse primer.
  • Deoxynucleoside triphosphates (dNTPs): Free nucleotides to be used in constructing the new copies of DNA.
  • Mix buffer: Necessary to create optimal conditions for activity of Taq DNA polymerase and may contain restriction enzymes, which act like molecular scissors cutting the copied DNA strands at particular locations based on their genetic code.
​The PCR mixture is placed inside a thermocycler (PCR machine). It is typically repeated about 35 times and the temperature changes are programmed by researchers and automated by the thermocycler. The process proceeds in three steps as outlined below.
  1. Denaturation: the solution is first heated to nearly boiling—95ºC. The heat breaks the hydrogen bonds between the two DNA strands and allows them to separate.
  2. Annealing: the temperature is dropped to around 60ºC. The exact temperature depends on the length and base composition of the primers. At this relatively low temperature, the primers can form hydrogen bonds with the single-stranded DNA. Two primer types are created, each one complementary in sequence to one of the two ends of the target DNA. To make the primers, the sequences at the ends of the target DNA must be known.
  3. Extension: the temperature is increased to 72ºC. This is the optimal temperature at which Taq polymerase functions. The primers are essential in this process, because they provide free 3’ hydroxyl groups, to which the polymerase can add additional dNTPs. Each new dNTP that joins the growing strand is complementary to the nucleotide in the opposite strand.
Picture
PCR components. Click to enlarge.
Picture
What is PCR? What kinds of questions can it help answer? Click to enlarge.

Procedure
  1. Navigate to the virtual PCR lab in the sidebar or through this url: https://learn.genetics.utah.edu/content/labs/pcr/.
  2. Be sure you are using the Chrome browser.
  3. Please allow pop-ups so you can be directed to download the FLASH player plug-in which is required for this lab.
  4. If that isn't working for you, you can download the plug-in directly from here.
  5. This lab will take through a typical PCR set-up, much like what we would have done in lab for each of our bushmeat sample DNA extractions. 
  6. Click begin, read carefully and work your way through each step. 
  7. Once you start pipetting, remember how they work...
  8. Place your pipette into the tube from which you want to draw up a sample. Then click your mouse and hold it down.
  9. This will draw up the sample. Remain holding down your mouse button.
  10. Move your pipette over to the PCR tube, and release your mouse button to deposit the contents.
  11. It may take you a few tries to work it out. Be patient.
  12. Take a selfie of you with the last (VERY PINK) image of the virtual lab!
  13. Complete your Lab Notebook Guide. 
Picture
This image shows the pipette after having drawn up the samples in the pink tube (your extracted DNA).
Picture
This virtual lab requires the FLASH Player plug-in. Please "allow pop-ups" in Chrome and download it as directed.
  • Exercise I
  • Exercise II
  • Exercise III 
<
>

Exercise I. How Does DNA Extraction Work?

Our meat samples have been collected, processed in the field and brought back to WKU. In the WKU Biotechnology Center, Ms. Naomi Rowland (our collaborator) has completed the digestion of the samples and a procedure designed to extract the DNA. DNA extraction is an important step in DNA analysis, which is at the forefront of biomedicine and forensics. DNA Extraction Buffer is used for this purpose.
Extraction of DNA from meat samples is a lengthy and difficult process. It has already been completed for our samples. Today, you will mirror this process: you will be extracting some of your own DNA from your cheek epithelial cells in a Bio @ Home activity. You may need to review the structure of DNA (covered in Ch 4 of your BIOL 120 Pearson text). 
Procedure: 3 Selfies
  1. Download the Lab 10 Lab Notebook Guide.
  2. You will need to take 3 selfies through this lab.
  3. Gather your equipment! You need the following: water, rubbing alcohol, dish-washing liquid (clear is best), salt and 3 clear plastic cups or glasses. You may also want food coloring and toothpicks.
  4. ​Take SELFIE 1 with your supplies.
  5. ​Put your alcohol in the freezer for 20 minutes before you begin. ​
  6. Add 1 tablespoon of salt to about 2 cups of drinking water.
  7. Stir until the salt is completely dissolved.
  8. Vigorously gargle salt water for a minute. Be aggressive with this. The goal is to get as many of your cheek cells into the solution as possible.
  9. Take SELFIE 2 as you gargle (lol). 
  10. ​Spit the salt water back into an empty cup or glass.
  11. Now slowly add 1ml (~20 drops or 1/3 teaspoon) of extraction buffer (dish-washing soap) to the salt water you just spit out. The soap will break open cheek cells and their nuclei walls by disrupting the lipid bi-layer. This causes the DNA to be released into the salt water.
  12. Pour 100 ml (1/2 cup) of alcohol in a separate clear plastic cup or glass.
  13. If you want to: Add a few drops of food coloring to the alcohol. 
  14. Tilt the salt water cup and slowly and carefully pour the alcohol down the side of your salt water cup. This MUST be gentle enough for the alcohol to form a layer ON TOP of the salt water/buffer solution.
  15. Wait for 4-5 minutes
  16. ​The DNA is insoluble in alcohol. You should see clumps of white, thread-like DNA rise to the top of the alcohol layer! 
  17. You can use toothpicks to gather it up and pull it out from the solution if you desire.
  18. Take SELFIE 3 with your DNA! 
  19. Complete the Lab Notebook Guide.
DNA extraction includes the use of an extraction buffer and ethanol:
  • Our extraction buffer includes detergent to break apart lipids and proteins and "free" the DNA from the nucleus (to get it out of the cell).
  • It also includes salt with (+) charged sodium ions to neutralizes the (-) charge on the sugar-phosphate backbone of DNA, making it less soluble in water (so it stays together).
  • We use ethanol to separate the DNA from the mixture. DNA is not soluble in ethanol so it is visible (so we can see it). For our purposes we will use isopropyl alcohol (rubbing alcohol) as a good substitute. 
Picture
Click to download.
Picture

Exercise II. What part of the DNA do we need? How much do we have?

Now, that understand the extraction process, let's move back to our bushmeat samples. Following extraction of DNA from the meat samples, we need to determine how much DNA we have. In other words...were we successful and to a high enough degree to allow for the next steps? Following extraction we have tons of DNA! But, that means that in fact we have a lot of genetic material that we do not need and certainly do not want to make copies of. DNA is conserved at different rates across species. Meaning we share different amounts and different genes. We need to find a gene (a section of DNA) that all mammals have, BUT that is a different enough in every species of mammal to afford us the ability to identify the species from the DNA sequence of the gene. The particular gene required is called the Gene of Interest or "GoI." ​​
  • Turns out, the DNA for ANY life, is very similar. For example we share 50% of our DNA with bananas. Within our species, we share 99.9%. Watch the video on SURPRISING Animals Related To Humans. It's fun reminder of how similar we all are! 
  • For our analysis, we need a gene that will allow for something called bar-coding. Essentially, bar-coding is using a short segment of DNA, particular to a certain gene, that differs enough to allow for species identification. This is similar to  the bar codes on grocery items, but instead of using lines of varying widths, we use the sequence of nucleotide base pairs (As, Cs, Ts and Gs) in specific genes. Which genes to use depends on your taxa and your research question. Watch the video on DNA Barcoding in the sidebar.
  • The region of DNA that codes for cytochrome complexes (b and c) is particularity useful in barcoding. Do you remember what cytochrome b and cytochrome c do? Think back to cellular respiration and the electron transport chain.  
Procedure​: Estimate the number of DNA fragments (our gene of interest, cytochrome b) we may have following extraction.
  1. Answer the questions associated with the videos in your Lab Notebook Guide.
  2. Following DNA extraction, we test the amount of purified DNA in our samples, to ensure enough product exists for PCR to work. We conduct this analysis using a spectrophotometer. The results for our samples are shown in the figure at right in ug/ng. ​Sample 8 yielded no genetic material.
  3. How much cytochrome b (cytb) DNA might we have? Using these results calculate the potential total number of cytochrome b (cytb) fragments we have extracted from each sample. ​
  4. Open the DNA YIELD CALCUALTIONS document  in the sidebar. You will make your calculations here and copy paste the table into your notebook guide.
  5. Of all the DNA we extracted first we need to determine how much is mitochondrial DNA? This is because the cytb gene is on mitochondrial DNA. Mitochondrial DNA (mtDNA) comprises ~ 3% of all DNA, is circular and contains roughly 16,000 base pairs (bp), on average, in mammals.
  6. Next we need to determine how much of the mtDNA might be cytb. ​The cytb gene comprises ~ 7% of mtDNA. Review the figure mapping mitochondria at the bottom of this page. ​ 
  7. Once you have determined the amount of cytb DNA we have (in ng/uL), the next column, the amount or number of strands we have, will auto-generate. 
  8. You will copy/paste your excel table into your Lab Notebook Guide.​
We will use the cytochrome b gene (CTYb) for species ID of our bushmeat samples. It meets our requirements. It is shared across all mammals BUT, differs enough between species for the sequence (of As, Ts, Cs and Gs) to give us a species-level ID.
Picture
DNA yield following extraction.
DNA yield calculations in excel
Picture
Plant barcoding studies use one or a few plastid regions and the internal transcribed spacer (ITS) region of nuclear ribosomal DNA.
Picture
Animal barcoding studies use a region in the mitochondrial cytochrome c oxidase 1 gene (“CO1”) or the cytochrome b gene (CYTb).
Picture
Gene map of human mitochondrial DNA. In mammals, each double-stranded circular mtDNA molecule consists of 15,000–17,000 base pairs. In humans, approximately 7% mtDNA is of cytb, which we are using to make our estimates.

EXERCISE III. Polymerase Chain Reaction

Polymerase chain reaction (PCR) involves the amplification (or copying) of a specific segment or fragment of DNA to allow for continued analysis. PCR can be used to: identify individuals or species,  for criminal proceedings, paternity determination or pathology. It is one of the most powerful tools of modern biology.
We would have created PCR cocktails for each of our bushmeat samples and placed into a thermocycler for synthesis. Instead, you will do a short virtual PCR lab. Read over the information in PCR below and complete the procedure.
​Once DNA has been extracted, it is mixed into a particular PCR solution containing:
  • Taq polymerase: A type of heat-stable DNA polymerase derived from a species of bacteria living in hot springs. Because Taq polymerase continues to function normally at high temperatures, using it allows researchers to separate the DNA strands without destroying the polymerase.
  • Primers: Short, single-stranded sequence of RNA or DNA that enables the start of replication of a DNA sequence that is synthesized from the 3’ end of the primer. Two types are needed, a forward and a reverse primer.
  • Deoxynucleoside triphosphates (dNTPs): Free nucleotides to be used in constructing the new copies of DNA.
  • Mix buffer: Necessary to create optimal conditions for activity of Taq DNA polymerase and may contain restriction enzymes, which act like molecular scissors cutting the copied DNA strands at particular locations based on their genetic code.
​The PCR mixture is placed inside a thermocycler (PCR machine). It is typically repeated about 35 times and the temperature changes are programmed by researchers and automated by the thermocycler. The process proceeds in three steps as outlined below.
  1. Denaturation: the solution is first heated to nearly boiling—95ºC. The heat breaks the hydrogen bonds between the two DNA strands and allows them to separate.
  2. Annealing: the temperature is dropped to around 60ºC. The exact temperature depends on the length and base composition of the primers. At this relatively low temperature, the primers can form hydrogen bonds with the single-stranded DNA. Two primer types are created, each one complementary in sequence to one of the two ends of the target DNA. To make the primers, the sequences at the ends of the target DNA must be known.
  3. Extension: the temperature is increased to 72ºC. This is the optimal temperature at which Taq polymerase functions. The primers are essential in this process, because they provide free 3’ hydroxyl groups, to which the polymerase can add additional dNTPs. Each new dNTP that joins the growing strand is complementary to the nucleotide in the opposite strand.
Picture
PCR components. Click to enlarge.
Picture
What is PCR? What kinds of questions can it help answer? Click to enlarge.

Procedure
  1. Navigate to the virtual PCR lab in the sidebar or through this url: https://learn.genetics.utah.edu/content/labs/pcr/.
  2. Be sure you are using the Chrome browser.
  3. Please allow pop-ups so you can be directed to download the FLASH player plug-in which is required for this lab.
  4. If that isn't working for you, you can download the plug-in directly from here.
  5. This lab will take through a typical PCR set-up, much like what we would have done in lab for each of our bushmeat sample DNA extractions. 
  6. Click begin, read carefully and work your way through each step. 
  7. Once you start pipetting, remember how they work...
  8. Place your pipette into the tube from which you want to draw up a sample. Then click your mouse and hold it down.
  9. This will draw up the sample. Remain holding down your mouse button.
  10. Move your pipette over to the PCR tube, and release your mouse button to deposit the contents.
  11. It may take you a few tries to work it out. Be patient.
  12. Take a selfie of you with the last (VERY PINK) image of the virtual lab!
  13. Complete your Lab Notebook Guide. 
Picture
This image shows the pipette after having drawn up the samples in the pink tube (your extracted DNA).
Picture
This virtual lab requires the FLASH Player plug-in. Please "allow pop-ups" in Chrome and download it as directed.

​Procedure: Part 1
  1. Download the Lab 12 Notebook Guide.
  2. Navigate to the virtual PCR lab in the sidebar or through this url: https://learn.genetics.utah.edu/content/labs/gel/
  3. Be sure you are using the Chrome browser.
  4. Please allow pop-ups so you can be directed to download the FLASH player plug-in which is required for this lab.
  5. If that isn't working for you, you can download the plug-in directly from here.
  6. ​Work through the lab, reading and following the directions carefully. Please note that the lab refers to a "DNA Size Standard." This is the same as the "ladder" referred to in the pre-lab.
  7. Take a selfie on the last lab page for your Notebook Guide.
  8. View the photo gallery below to better familiarize yourself with the techniques and equipment we would have used in lab.

Lab 10: Pre-Lab

Your task in Lab 10 and Lab 11 is to identify the species of origin of a meat sample from a Kenyan butchery. You will learn about poaching, the bushmeat crisis and practice key techniques to complete DNA analysis of your sample. To prepare for Lab 10, please review this pre-lab page. Once you feel confident regarding the below topics, complete the corresponding pre-lab quiz in Blackboard.

1) What is bushmeat?

Kenya's wildlife is in decline in part due to poaching of commercially valuable species. In many areas, poaching in the form of snaring  is commonplace, largely due to a lack of resources, food insecurity and poverty.  Increased poaching effort has reportedly led to an increase in bushmeat in Kenya's markets and butcheries. 
Picture
Bushmeat is legal in some African countries but is illegal in Kenya. ​​Once bushmeat as been processed, it is indistinguishable from domestic meat. Therefore DNA analysis is required to determined if the meat sold, labeled as beef, pork, goat or lamb, is actually wildlife meat. ​​We will be testing several samples to ascertain the species of origin.
Please read over the summary below from a report entitled "Lifting the Siege: Securing Kenya's Wildlife."
bushmeat report summary
Picture
Commonly snared species include (from left to right), dik dik, zebra, gazelles and impala.

2) Where did our meat samples originate? 

Picture
Mount Kasigau as viewed from a community property bordering Tsavo West National Park.
View Mount Kasigau on Google Earth
Our samples are from the Taita Taveta district of southeastern Kenya, which includes Kenya's largest national park system, Tsavo East and Tsavo West National Parks. Specifically, our samples are from the Kasigau area between the two parks, located on the trailing edge of the Eastern Arc Mountains. The Kasigau landscape is dominated by Mt. Kasigau, which the Titata people settled around to serve as a water catchment. The area also serves as a migration corridor between Tsavo East and West National Parks and is rife with human wildlife conflict. 
Picture
​Over the next several years BIOL 121 students will be testing samples from the five villages that surround Mt. Kasigau: Mwakasinyi, Keteghe, Rukanga, Jora and Bungule. Every semester we will be adding to a bushmeat database, which can be used by conservation groups and the Kenyan Wildife Service to locate hotspots of poaching and bushmeat activity. This semster's samples were sourced from 8 butcheries (view slideshow) from the villages of Rukanga (samples 1-6), Jora (sample 7) and Bungule (sample 8).

3) What will we do in lab & how will we do it?

We will be going through some of the steps required to identify the species of various meat samples in the next two labs. In order for things to go smoothly, you need to be familiar with the basic steps of DNA analysis and some of the specifics of bushmeat analysis in particular.
Picture
1) Bushmeat Processing
Using aseptic techniques, the bushmeat samples are cut into approximately 1 cc sections. They labeled and stored in ethanol at -20 degrees Celsius. Special care is taken to ensure no cross-contamination or human contamination occurs. Samples are then carried back or shipped to the WKU biotechnology Center. -----> This has already been done.
Picture
2) Digestion & Extraction
This process is similar to the extraction we completed with the strawberry. However it involves many more steps and results in a cleaner product with far less protein. We use special "kits" as pictured to streamline the process. Digestion liquefies the tissue in such a way that keeps the DNA intact for extraction. Once extraction is complete, the DNA sample is tested to ensure an adequate amount of intact DNA was extracted from the sample. ​
​-----> This process has already been done with our meat samples. In Lab 10, you will practice extracting DNA from a strawberry to better understand this process
Picture
3) Polymerase chain reaction (PCR)
PCR makes copies of a DNA fragment from one original copy. The goal is to amplify a specific region, the target DNA or gene of interest (GoI), depending on the type or goal of research. The PCR cocktail includes the following ingredients:  the DNA sample, primers (short sequences of RNA or DNA that start replication), dNTPs  (free nucleotides), taq polymerase (a heat stable form of DNA polymerase derived from bacteria) and a buffer solution. There are three steps to PCR in which the temperature is cycled (in the thermo"cyler"). You need to know the steps and what happens in each! The total number of resulting DNA strands is (the number of original strands) X 2^n, where n = the number of PCR cycles. -----> In Lab 10, you will be given PCR products from our meat samples in lab and asked make some calculations.
Picture
4) Gel electrophoresis
Agarose gel electrophoresis is a method used to separate DNA strands by size, and to determine the size of the separated strands by comparison to strands of known length. ​Your PCR products are deposited in the top of the gel. Using electricity, the DNA (with a negative charge) is pushed through the gel towards the positive electrode. As your gel "runs," the DNA is separated by size. The DNA strands show up as bands under UV light and you can read the results. Your products can be compared with the ladder or marker, which has standard sized DNA fragments of KNOWN length used for comparison. In this way, you can know the exact length of your DNA samples. -----> You will MAKE & RUN an agorose gel in Lab 11 to make sure our PCR product contains the cytochrome b gene.
Picture
5) Sequencing
Once we know we have amplified (copied) the right gene we are ready to sequence the gene. We expect the sequence (the order of As, Ts, Cs and Gs) within the cytochrome b gene to be different for different species. Samples are placed into a sequncer apparatus which can detect the order of nucleotide bases in our sample. The sequence is then cleaned and edited,
Picture
6) BLASTing
The National Institute of Health (NIH) and National Center for Biotechnology Information (NCBI) hosts a database called GenBank, which houses all known DNA sequences. Once the sequences of our samples are ready, they are pasted into a search tool (called a BLAST) which matches them to the correct species! -----> You will be provided the sequence of successful samples in Lab 11 and asked to determine the species of origin in lab.
Picture
Picture
Click here to get to WKU's blackboard to take your Lab 10 Pre-Lab Quiz.

Lab 10: Protocol

madoqua kirkii
Your task in Lab 10 is to replicate a DNA extraction protocol and determine how much DNA we have successfully extracted form our samples and how much DNA we have following PCR. 
​
​Exercise I. How do you extract DNA?
Exercise II. Determine How Much DNA We Have After Extraction
​Exercise III. Determine How Much DNA We Have After PCR
Picture
Lab 10 & 11 Objectives (click to enlarge).

Exercise II. How much DNA do we have?

Now, let's move on to our own samples. Following extraction of DNA from the meat samples, we need to determine how much DNA we have. In other words...we're we successful and to a high enough degree to allow for the next steps?
Proceedure: Estimate the number of DNA fragments (our gene of interest, cytochrome b) we may have by the end of PCR.
1) We start here! Following DNA extraction, we test the amount of purified DNA in our samples, to ensure enough product exists for PCR to work. We conduct this analysis using a spectrophotometer. The results for our samples are shown in the figure at right in ug/ng. ​Sample 8 yielded no genetic material.
2) How much cytochrome b (cytb) DNA might we have? Using these results calculate the potential total number of cytochrome b (cytb) fragments we have extracted from each sample. ​
Wait! Why are we looking for the cytochrome b gene? All DNA is NOT the same. Some genes are more conserved than others. The DNA for life, is very similar. For example we share 50% our DNA with bananas. Within our species, we share 99.%. The genes that can be used to distinguish between mammal species are specific. Cytochrome b is one such gene. The sequence of As, Cs, Ts and Gs can tell us from which species it originated. 
So now our task is to determine out of all the DNA we have extracted, approximately how much if the cytochrome b gene do we have?

​You need the following to make your calculations:
  • You should use THIS SPREADSHEET for your calculations. You will need to submit it for the post-lab.
  • The cytochrome b gene is in mitochondrial (not nuclear) DNA.
  • Mitochondrial DNA (mtDNA) comprises ~ 3% of all DNA, is circular and contains roughly 16,000 base pairs (bp), on average, in mammals.
  • The cytb gene has approximately 1,200bp and comprises ~ 7% of mtDNA.
  • Once you have used the above to determine the amount of cytb DNA we have (in ug/ng), use THIS CALCULATOR to estimate the number of copies we have of the gene in each sample.
DNA Copy CALCULATOR
Picture
DNA yield following extraction
Picture
Gene map of human mitochondrial DNA. In mammals, each double-stranded circular mtDNA molecule consists of 15,000–17,000 base pairs. In humans, approximately 7% mtDNA is of cytb, which we are using to make our estimates.

​Exercise III. Determine PCR Yield

Once we know we have enough of the cytochrome b gene, we are ready for PCR. 
Procedure: How much useful DNA will we have following PCR?
​
​1) View this 3-minute video on PCR. You need to know the ingredients for PCR and why each is used. You also need to know the three steps and what happens in each one. You do not need to know the timing of the steps nor their corresponding temperature. 
Picture
Research library
2) Visit our research library to learn a bit more about PCR. You need to know the ingredients for PCR and why each is used. You also need to know the three steps and what happens in each one. You do not need to know the timing of the steps nor their corresponding temperature. 

3) We use an enzyme in PCR called Taq Polymerase. It mirrors the same action of DNA polymerase in our own cells during DNA synthesis. 

Picture
You'll review the entire process of DNA synthesis in BIOL 120. In it, DNA polymerase builds the new copies of DNA strands from the original template.
Picture
We use Taq-Polymerase in the same way in PCR. It is an enzyme from heat resistant bacteria (Thermus aquaticus) and can therefore function at th ehigh temperatures used in th ethermocycler.
​3) Now, let's calculate our PCR yield: how many copies of the cytochrome b gene we may have in each sample following PCR (if all went according to plan). We performed 35 cycles of PCR on our bushmeat samples.  Initial denaturation at 94 °C for 4 min and with a final extension at 72 °C for 10 minutes. The equation to calculate the final number of DNA strands created by PCR = N2^n, where N = the original number of DNA molecules to be copied and n = the # of PCR cycles.

​4) Add these calculations for each sample to your spreadsheet. 
​
Picture

Next week in our last lab, Lab 11, we will start here. We will test the products of the PCR via gel electrophoresis and we will analyze the sequence of each sample to determine its mammalian source.

Lab 10: Post Lab

In Lab 10, you worked with your lab group to identify the species of origin of a meat sample from a Kenyan butchery. Please complete the 2-part follow-up assignment below regarding the outcomes of Lab 10.

Part I. Add to our Research Library

Help us build a better research library. Please find at least one reference, about bushmeat, Kasigau or Tsavo, or DNA sequencing for species identification. 

    Upload Your New Article

Submit

Part I. Post Lab Analysis

Please upload your excel sheet including our DNA concentration calculations. It is NOT complete at this time. That's OK! We'll finish this work in Lab 11!

    Upload Your Post-Lab Analysis

    Max file size: 20MB
Submit
Picture

Lab 10 BIOL 120 CONNECTIONS
Section 1.6: Doing Biology
Big Picture 1: How to Think Like a Scientist
Chapter 4: Nucleic Acids
Chapter 15: DNA and the Gene
Chapter 20: The Molecular Revolution
Chapter 54: Biodiversity and Conservation Biology *BIOL 122

Picture
The Department of Biology at WKU strives to create a dynamic, experiential learning environment, and to be a destination department for competitive undergraduate and graduate students, involving them in the process of science and preparing them for success in a global society. This website is intended solely for use of BIOL 121 students. The information here is copyrighted or within "Fair Use" under the scholarship or education exemption.

  • Home
  • About
  • Unit 1
    • Lab 1
    • Lab 2
    • Lab 3
    • Lab 4
    • Lab 5 ONLINE ONLY
  • Unit 2
    • Lab 6 Part 1 OnLine
    • Lab 6 Part 2
    • Lab 7
    • Lab 8
  • Unit 3
    • Lab 10
    • Lab 11
    • Lab 12 Online
  • Library
  • WKU Blackboard