Lab 4: Pre-Lab
We have already learned a lot about the disease itself and the role glucose plays in diabetes. This lab will focus on the biochemistry behind some the symptoms of diabetes and necessitates further understanding of macromolecules (carbs, lipids and proteins) and of cells. You will explore diffusion and the insulin transduction pathway. You will conduct a series of tests to evaluate the effects of disruption of this pathway in diabetics.
How does glucose get into our cells?
|
The phospholipid bi-layer around cells protects life from non-life. Comprised of two layers of amphipathic phospholipds (with hydrophilic phosphate heads facing outwards and hydrophobic lipid tails facing inward, the cell membrane regulates what gets into a cell and what gets out. Molecules can enter a cell in three primary ways:

Click on the link below for a brief explanation! |

Cell membrane - the phospholipid bi-layer

The role of cellular transport in digestion
|

Review the types of transport above. Make sure you understand which is which. Brainstorm some potential characteristics that may make it less likely for a substances to move via diffusion alone.
Do you know what happens in individuals with Type 2 Diabetes?
What happens if glucose doesn't get into the cell? The effect is an increased concentration of glucose in the blood. This establishes a concentration gradient, with higher concentrations of glucose outside the cell than inside the cell, a condition referred to as hyperglycemia. As diabetics often use artificial insulin (which we will discuss later) to regulate their blood sugar, they can also experience extremely low blood sugar due to insulin dosing and diet. This condition is known as hypoglycemia. In both conditions, osmosis will occur in an attempt to regulate the in-balance and maintain homeostasis.
Osmosis is a particular type of diffusion. It is automatoc and passive (requires no energy). In osmosis, water moves from areas with low solute concentration to areas of high solute concentration until equilibrium is reached. You can think of water moving to another side to "water it down," like adding water to too sweet tea. When predicting the flow of water during osmosis, you can think of differences between intracellular and extracellular environments in terms of tonicity. These terms refer to the solution of the extracellular environment in comparison to the intracellular environment:

Be sure you understand the difference between diffusion and osmosis and that you could diagram each process. 
Please review the conditions of hypo (think LOW) and hyperglycemia including the associated symptoms of each.
|

Hypoglycemic and hyperglycemic blood glucose levels vs. normal. Click to enlarge.

Symptoms of hypo & hyperglycemia. Click to enlarge.
|
What will we do in lab and how will we do it?
|
Lab 4 will proceed in three parts.
1) Predict the glucose concentration of three samples: In the lab you will be provided with
2) Glucose Testing Strips: You will check the contents of each solution using glucose testing strips and compare them to your precitions. 3) Review signal transduction pathways: If it's hard or impossible for glucose to move across the membrane of some cells, how does it get in? We will research this pathway and the vital role it plays in diabetes. |

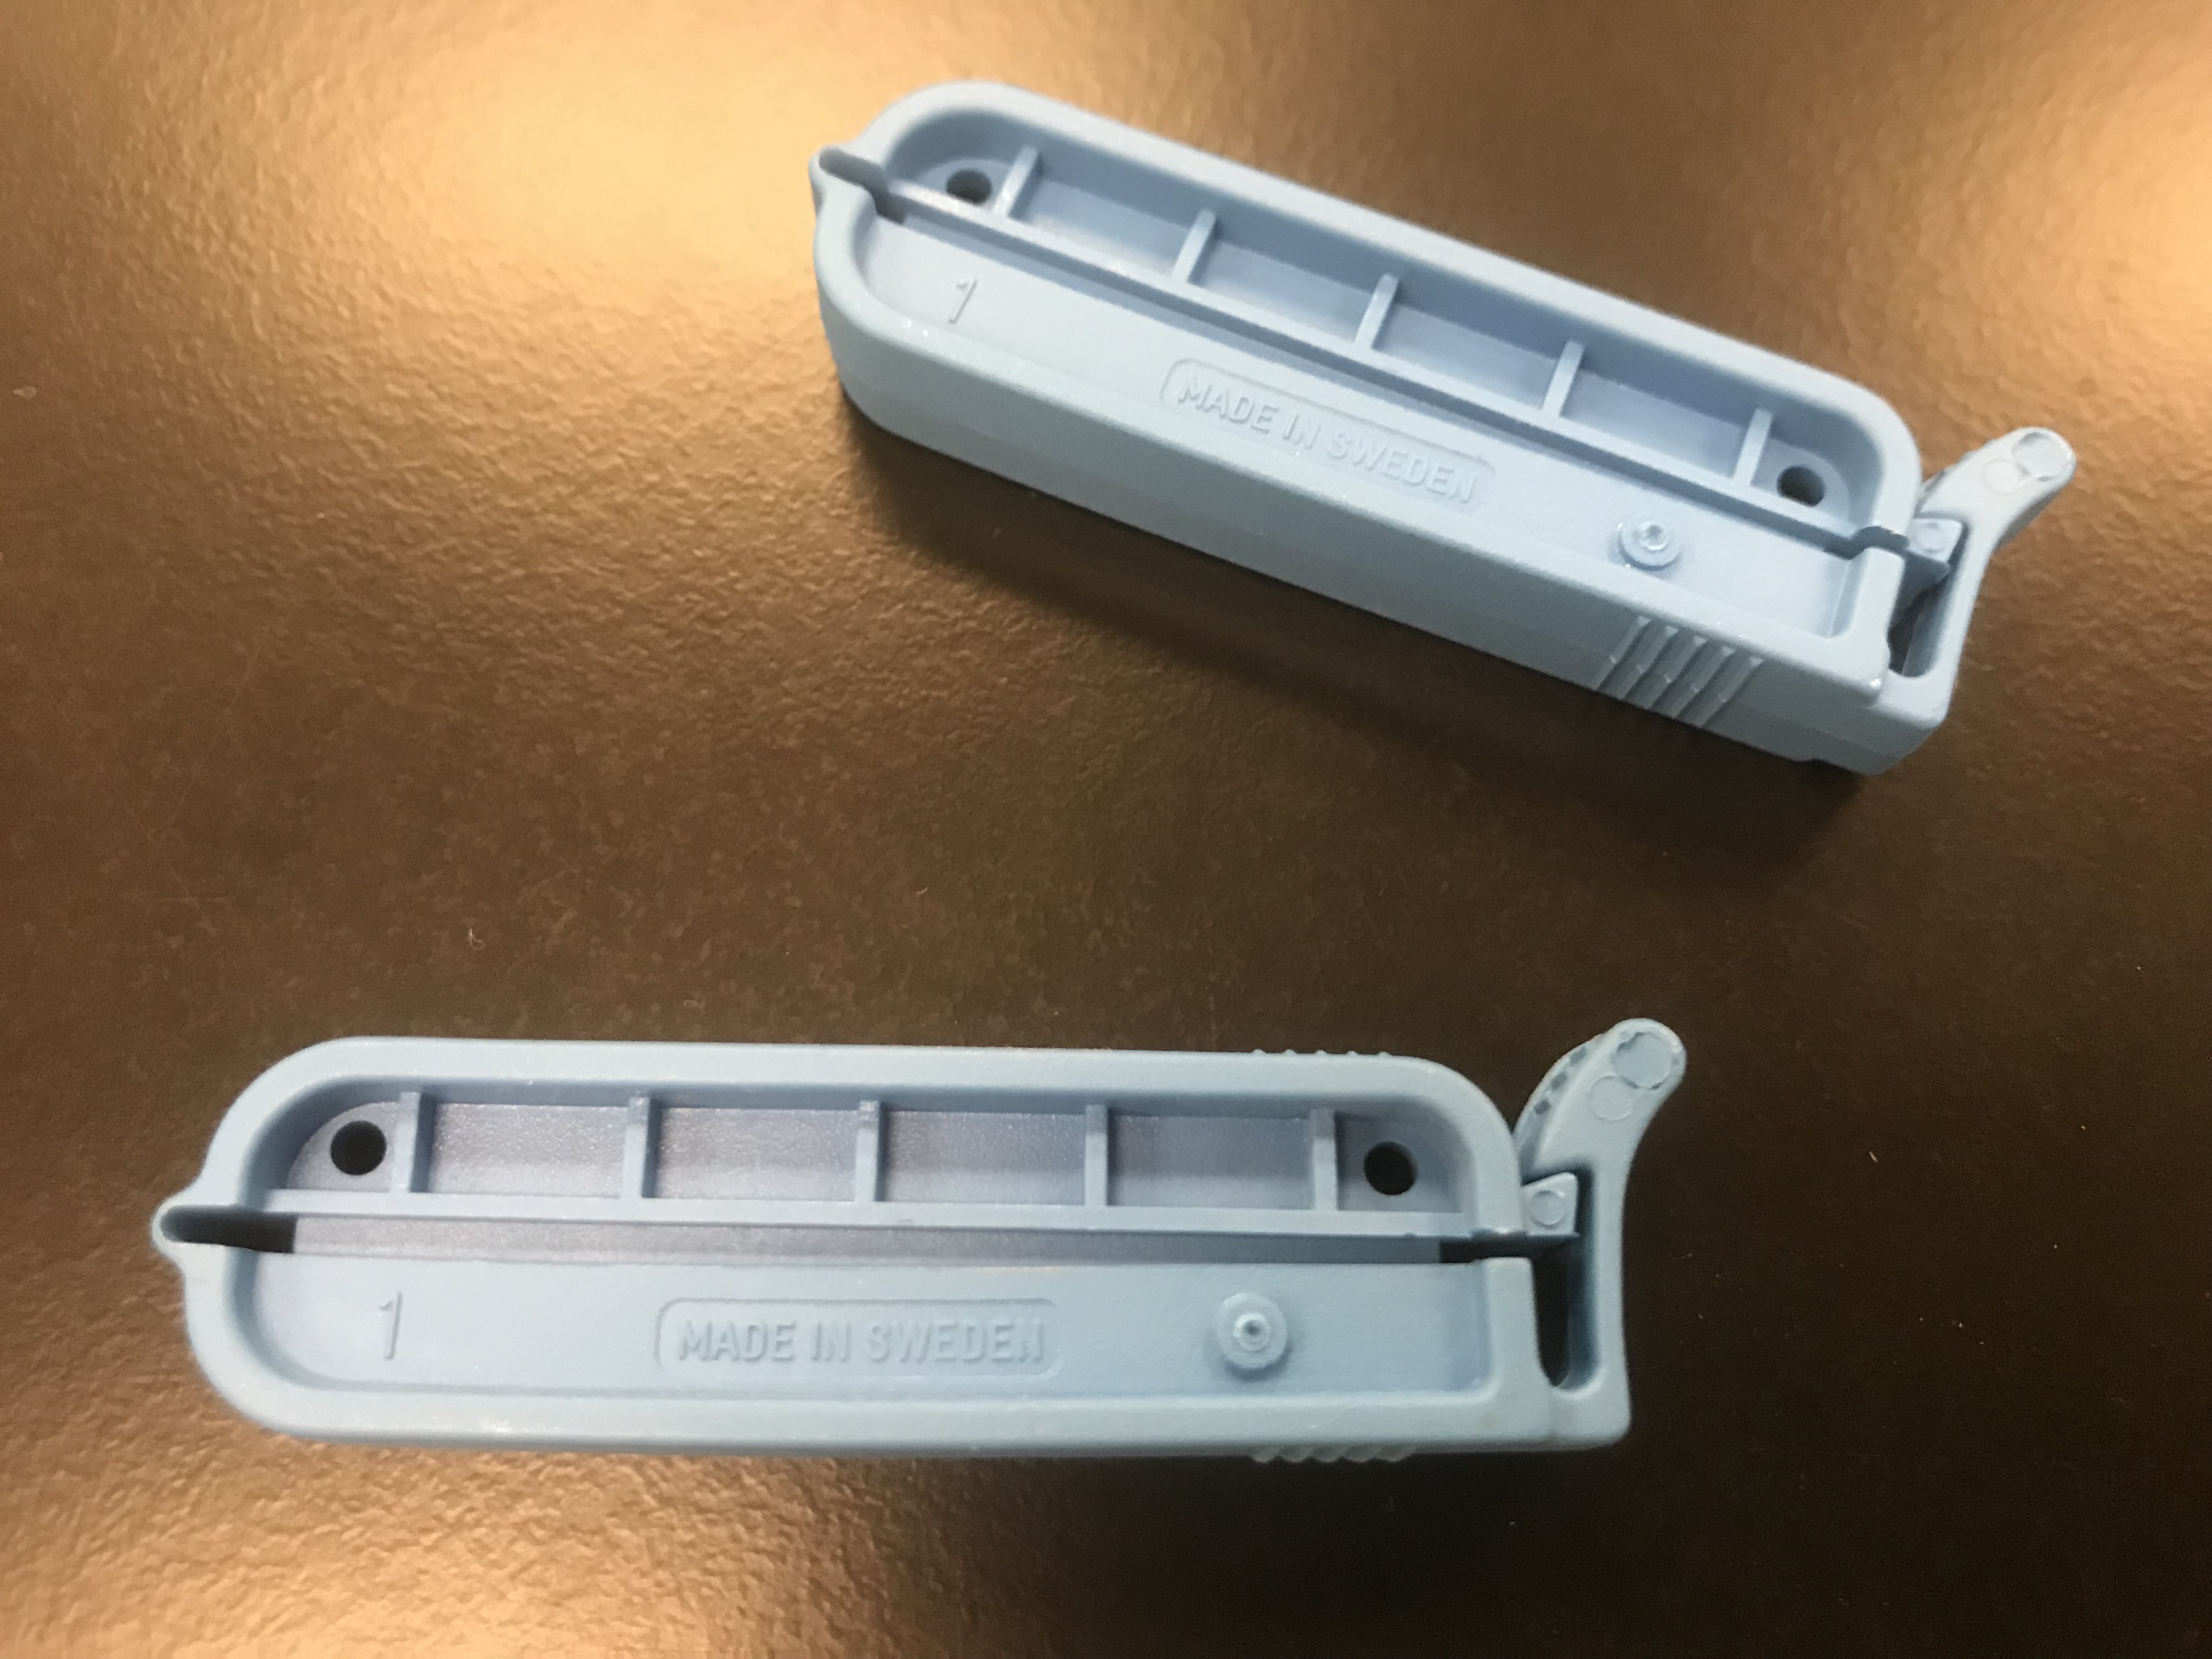
"Cell" in solution in Exercise III
|

If you feel confident with this material, click the bridge icon and navigate to Blackboard to take the LABridge for Lab 3 & 4. Be ready to tested on this Pre-Lab material and make sure you have your Lab Notebook Guide from Lab 3 ready to submit.

Click here to get to WKU's blackboard to take your LABridge for this week. Be sure your Notebook Entry from last lab is ready to submit!
Lab 4: Protocol
|
In today's lab you will design an experiment which relies on the principles of osmoregulation to predict the condition of diabetic patients, and you will explore signal transduction pathways to understand the role they play in diabetes.
Exercise I. Predict the glucose concentration of three samples. Exercise II. Compare predictions with testing strips Exercise III. Review signal transduction pathways |

Lab Objectives: Following today's lab, you should be able to...
|
Exercise I. Determine the condition of diabetic patients: Hyper or Hypoglycemic?
As you read in the Pre-Lab, insulin enters our cells in several ways. The most important pathway is the insulin transduction pathway (which you will learn more about in Exercise III). This pathway is disrupted in diabetics either because insulin doesn't bind to the receptor or the receptor isn't activated upon binding. Regardless of the cause, the effect is an increased concentration of glucose (solute) in the blood. When this happens water moves into and out of cells attempting to reach an equilibrium, a process called osmoregulation.

At Your Stations
|
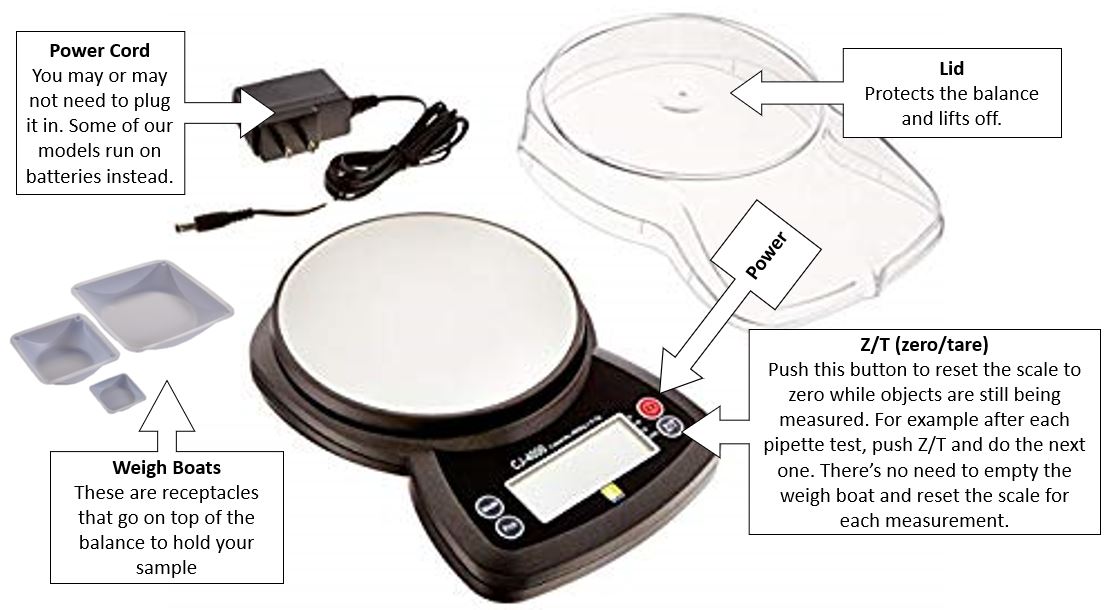
Tool Kit:
|
In this experiment you are going to use the water loss or water gain of an artificial "cell" to predict the status of the extracellular environment (e.g., hypertonic or hypotonic) and the condition of each patient (hyperglycemic or hypoglycemic).
|
Procedure
|

Tonicity of the extracellular environment.

Related conditions in diabetics.


Blood Glucose Level (BGL) Chart. Click to enlarge.
|
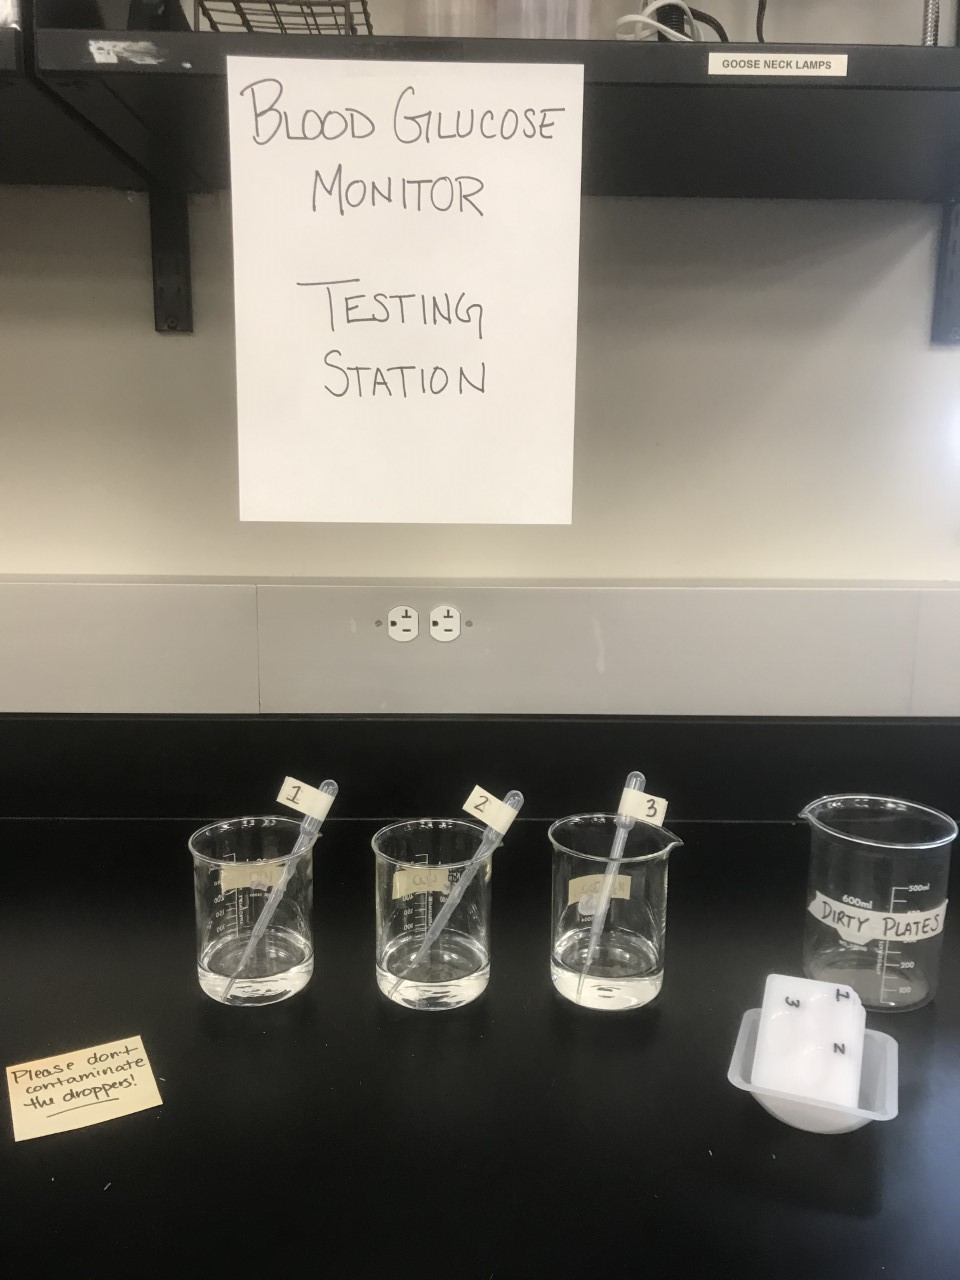
Exercise II. Test your predictions using a blood glucose meterMaterials: Your Tool Kit
|

Blood Glucose Level (BGL) Chart. Click to enlarge.
|

|
|
Exercise III. Explore the insulin transduction pathway
What does all this evidence tell you about the importance of insulin regulation? Without it, the hyper and hypo-hypoglycemia that results can lead to serious health risks and even death. These osmoregulatory conditions come about when the insulin transduction pathway (the most important way BGLs are regulated) breaks down. You will learn about this pathway in Exercise III.
|
Signal transduction is imperative for cell-to-cell signaling. These biochemical pathways convert an extracellular signal to an intracellular signal, thus passing messages across our bodies. Transduction pathways occur when a signaling molecule binds to the surface of a cell, and its signal is then transferred and converted through a series of events to reach a target inside the cell, and cause the intended response.
Insulin is a signaling molecule secreted by the pancreas when blood glucose levels are high. Insulin is a peptide hormone, in-soluble in lipids, and therefore cannot cross the cell membrane. Instead, a transduction pathway is required. In the pathway, insulin binds to a receptor in the cell membrane which triggers glucose uptake into the cell by a glucose transporter (typically GLUT-4). This uptake eventually decreases blood glucose levels. A transduction pathway is required for this to occur because:
Insulin is not required for all types of glucose uptake, but is required for muscle and fat tissues. Insulin-mediated glucose uptake is the pathway most responsible for blood sugar regulation. Procedure
|

General transduction pathway. Click to enlarge.

Insulin transduction pathway diagram. Click to enlarge.

Flow chart/ Concept Map example of G-protein pathways (covered in BIOL 120). Click to enlarge.
|

|
Lab 4 BIOL 120 CONNECTIONS Section 6.2: Phospholipid Bilayers Section 6.3: How Substances Move Across Lipid Bilayers: Diffiusion & Osmosis Section 6.4: Proteins Alter Membrane Structure & Function Section 11.3: How do Distant Cells Communicate? Section 41.4: Nutritional Homeostasis Glucose as a Case Study |
Faculty Spotlight: Dr. Ajay Srivastava

Email: [email protected]
|
The Srivastava lab uses fruit flies (Drosophila) to better understand cell development and disease. Dr. Srivastava is particularly interested in the connection between the Extracellular Matrix (ECM) and the production and formation of tumors. The ECM is a dense network that connects the phospholipid bi-layer to the external cellular environment and is vital in cell structural support, growth and signaling. Just as our understanding of the cell membrane helps in the treatment of diabetes, Dr. Srivastava hopes that expanding our knowledge of the ECM can augment our understanding of cancer (Lab Web Page). He is always looking for talented and interested undergrads to help with his research! Check here for available positions. |
|
The Department of Biology at WKU strives to create a dynamic, experiential learning environment, and to be a destination department for competitive undergraduate and graduate students, involving them in the process of science and preparing them for success in a global society. This website is intended solely for use of BIOL 121 students. The information here is copyrighted or within "Fair Use" under the scholarship or education exemption.
|
|